Set up the Deductions Model calculator
Use these instructions to configure the calculator for a new RF Deductions Group. Setup includes selecting your RF Deductions Group and setting up payors.
-
If you have not already done so, set up RF deductions groups.
-
In the RF Admin task pane under Other Calculators, double-click Deductions Model Configuration Utility.
NOTE: The utility opens as read-only but saves as Save Data Only.
-
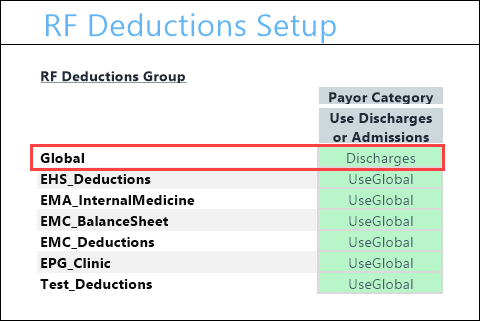
The first section in the utility is the statistical section. The Global row contains the default setting for the calculator, so whatever is configured here will be used unless you set up RF deductions groups that supersede the Global setting.
-
In the Global row of the Payor Category column, set the global discharges/admissions to be used for RF deductions groups. The Global default is Discharges.
-
Below the Global row are your RF deductions group rows. For non-global groups, the default is UseGlobal. If any of these need to be different from the Global setting, then in the Use Discharges/Admissions column, select the desired exception from the drop-down for that RF deductions group.
-
-
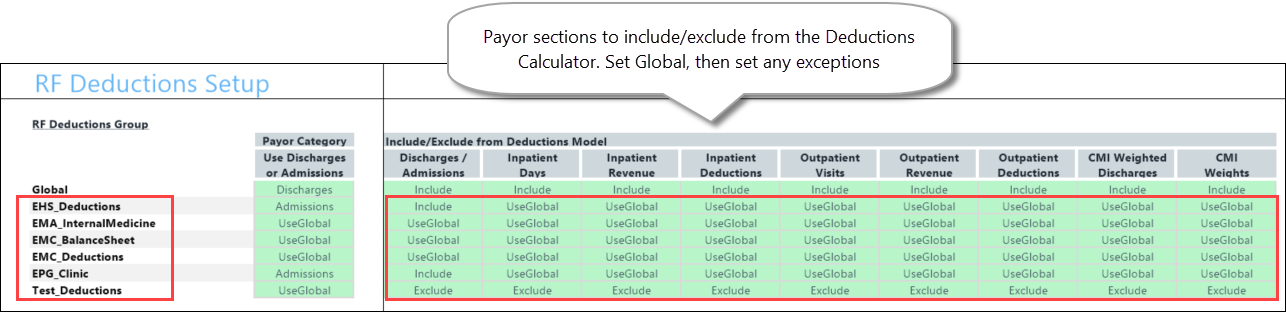
Select whether or not to include each payor category in the Deductions Model calculator. For Global, the default is Include. For non-global plan groups, the default is UseGlobal.
-
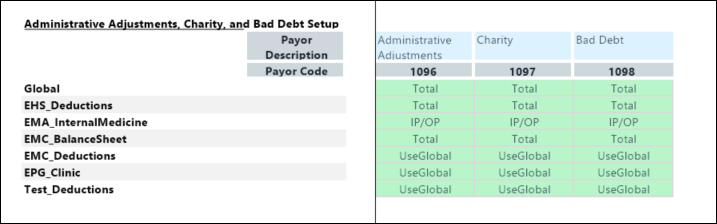
In the next section, configure Administrative Adjustments, Charity, and Bad Debt. These settings determine whether the totals in the corresponding sections on the calculator’s Deductions tab are displayed as two amounts: one for inpatient and outpatient (IP/OP) or combined into a single total (Total).
For Global, the default is Total. For non-global plan groups, the default is UseGlobal.
-
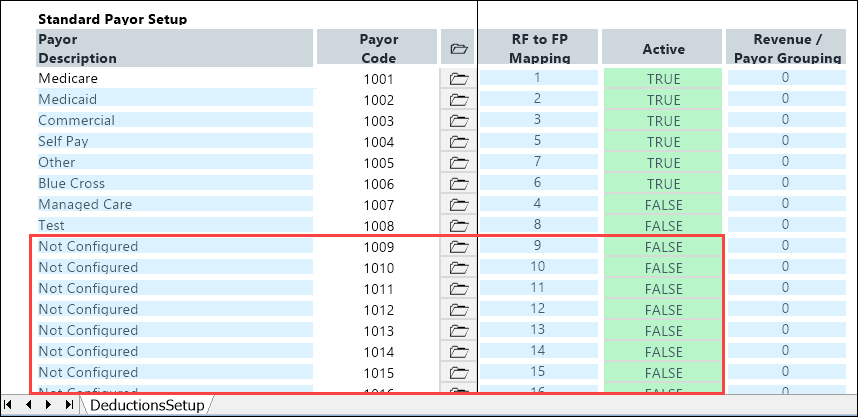
In the last section, you can add new payors and then map them to the FP payor code. The first payor is fixed as Medicare and cannot be changed. Payor numbers 1096, 1097, and 1098 are reserved for Administrative, Charity, and Bad Debt). To add a payor, in the next available “Not Configured” row, type a payor name into the blue cell and then, in the Active column, select TRUE.
-
In the Main ribbon tab, click Save.
